You know you’re looking at a French RPG convention when you have never heard of 80% of the games listed in the schedule… 😅
The Stochastic Game
Ramblings of General Geekery
Unapologetically Pacific Northwestern, these wooden dice from Adventure Dice look so nice on a rainy day!
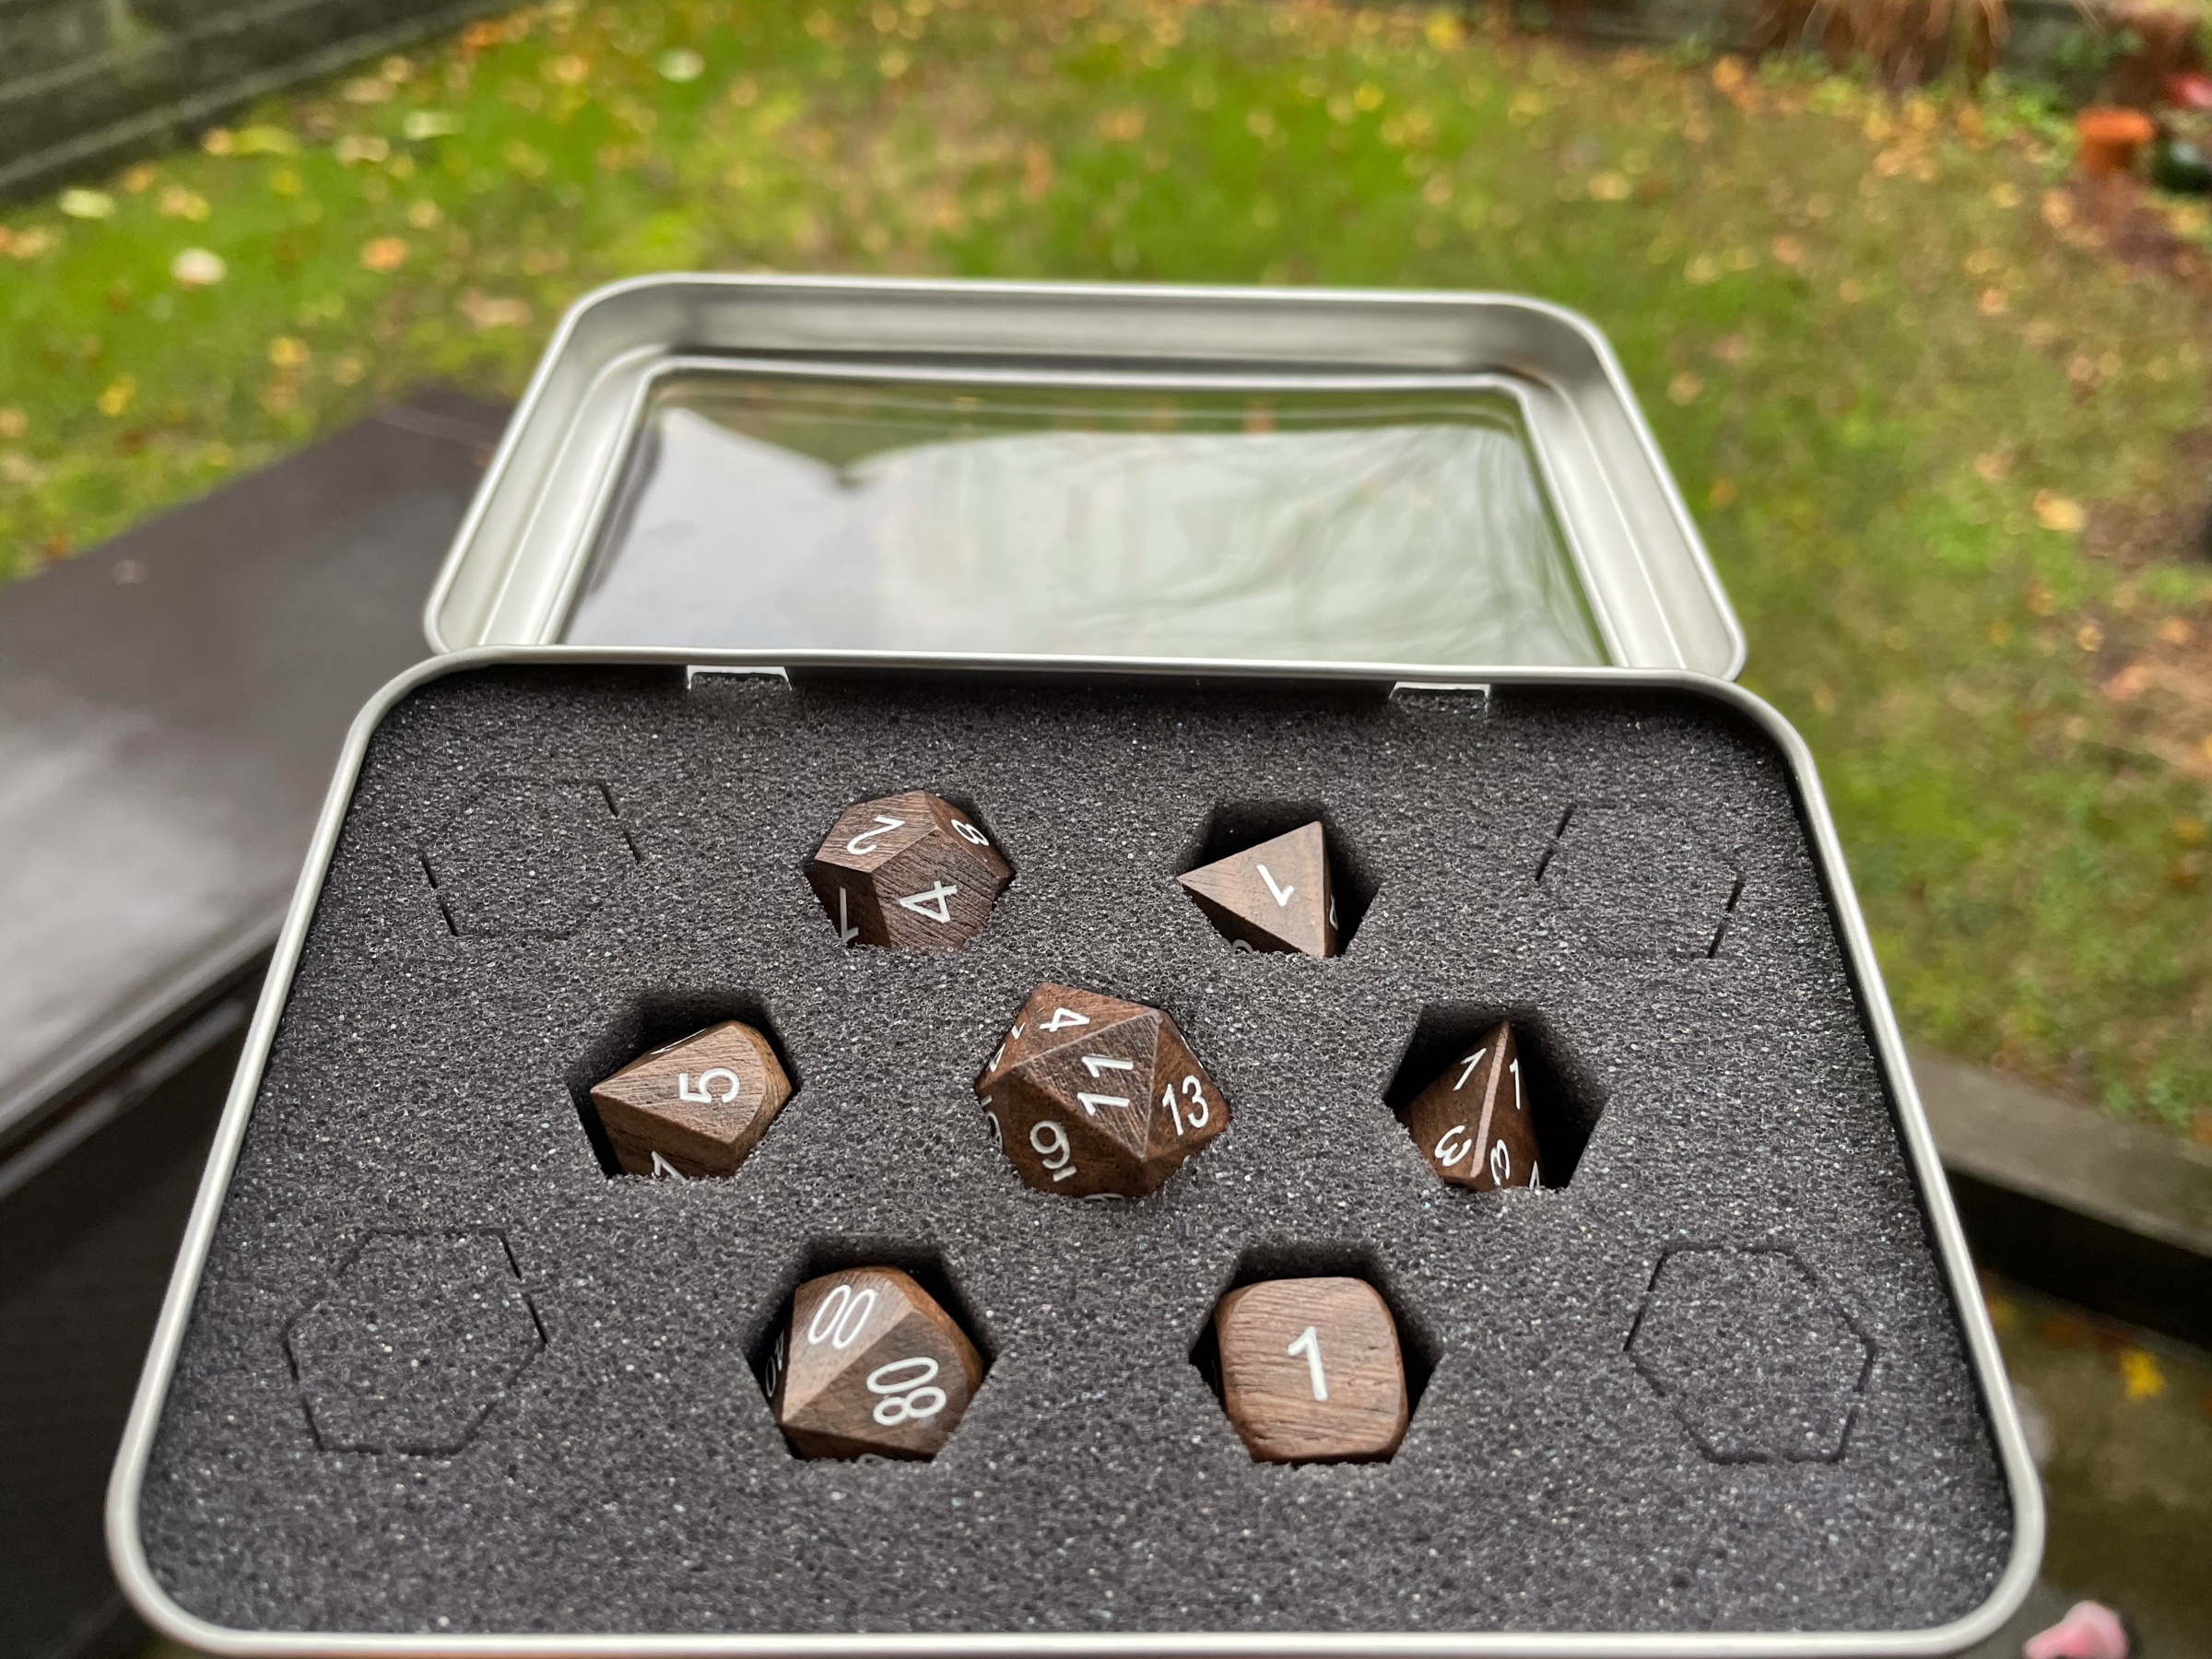
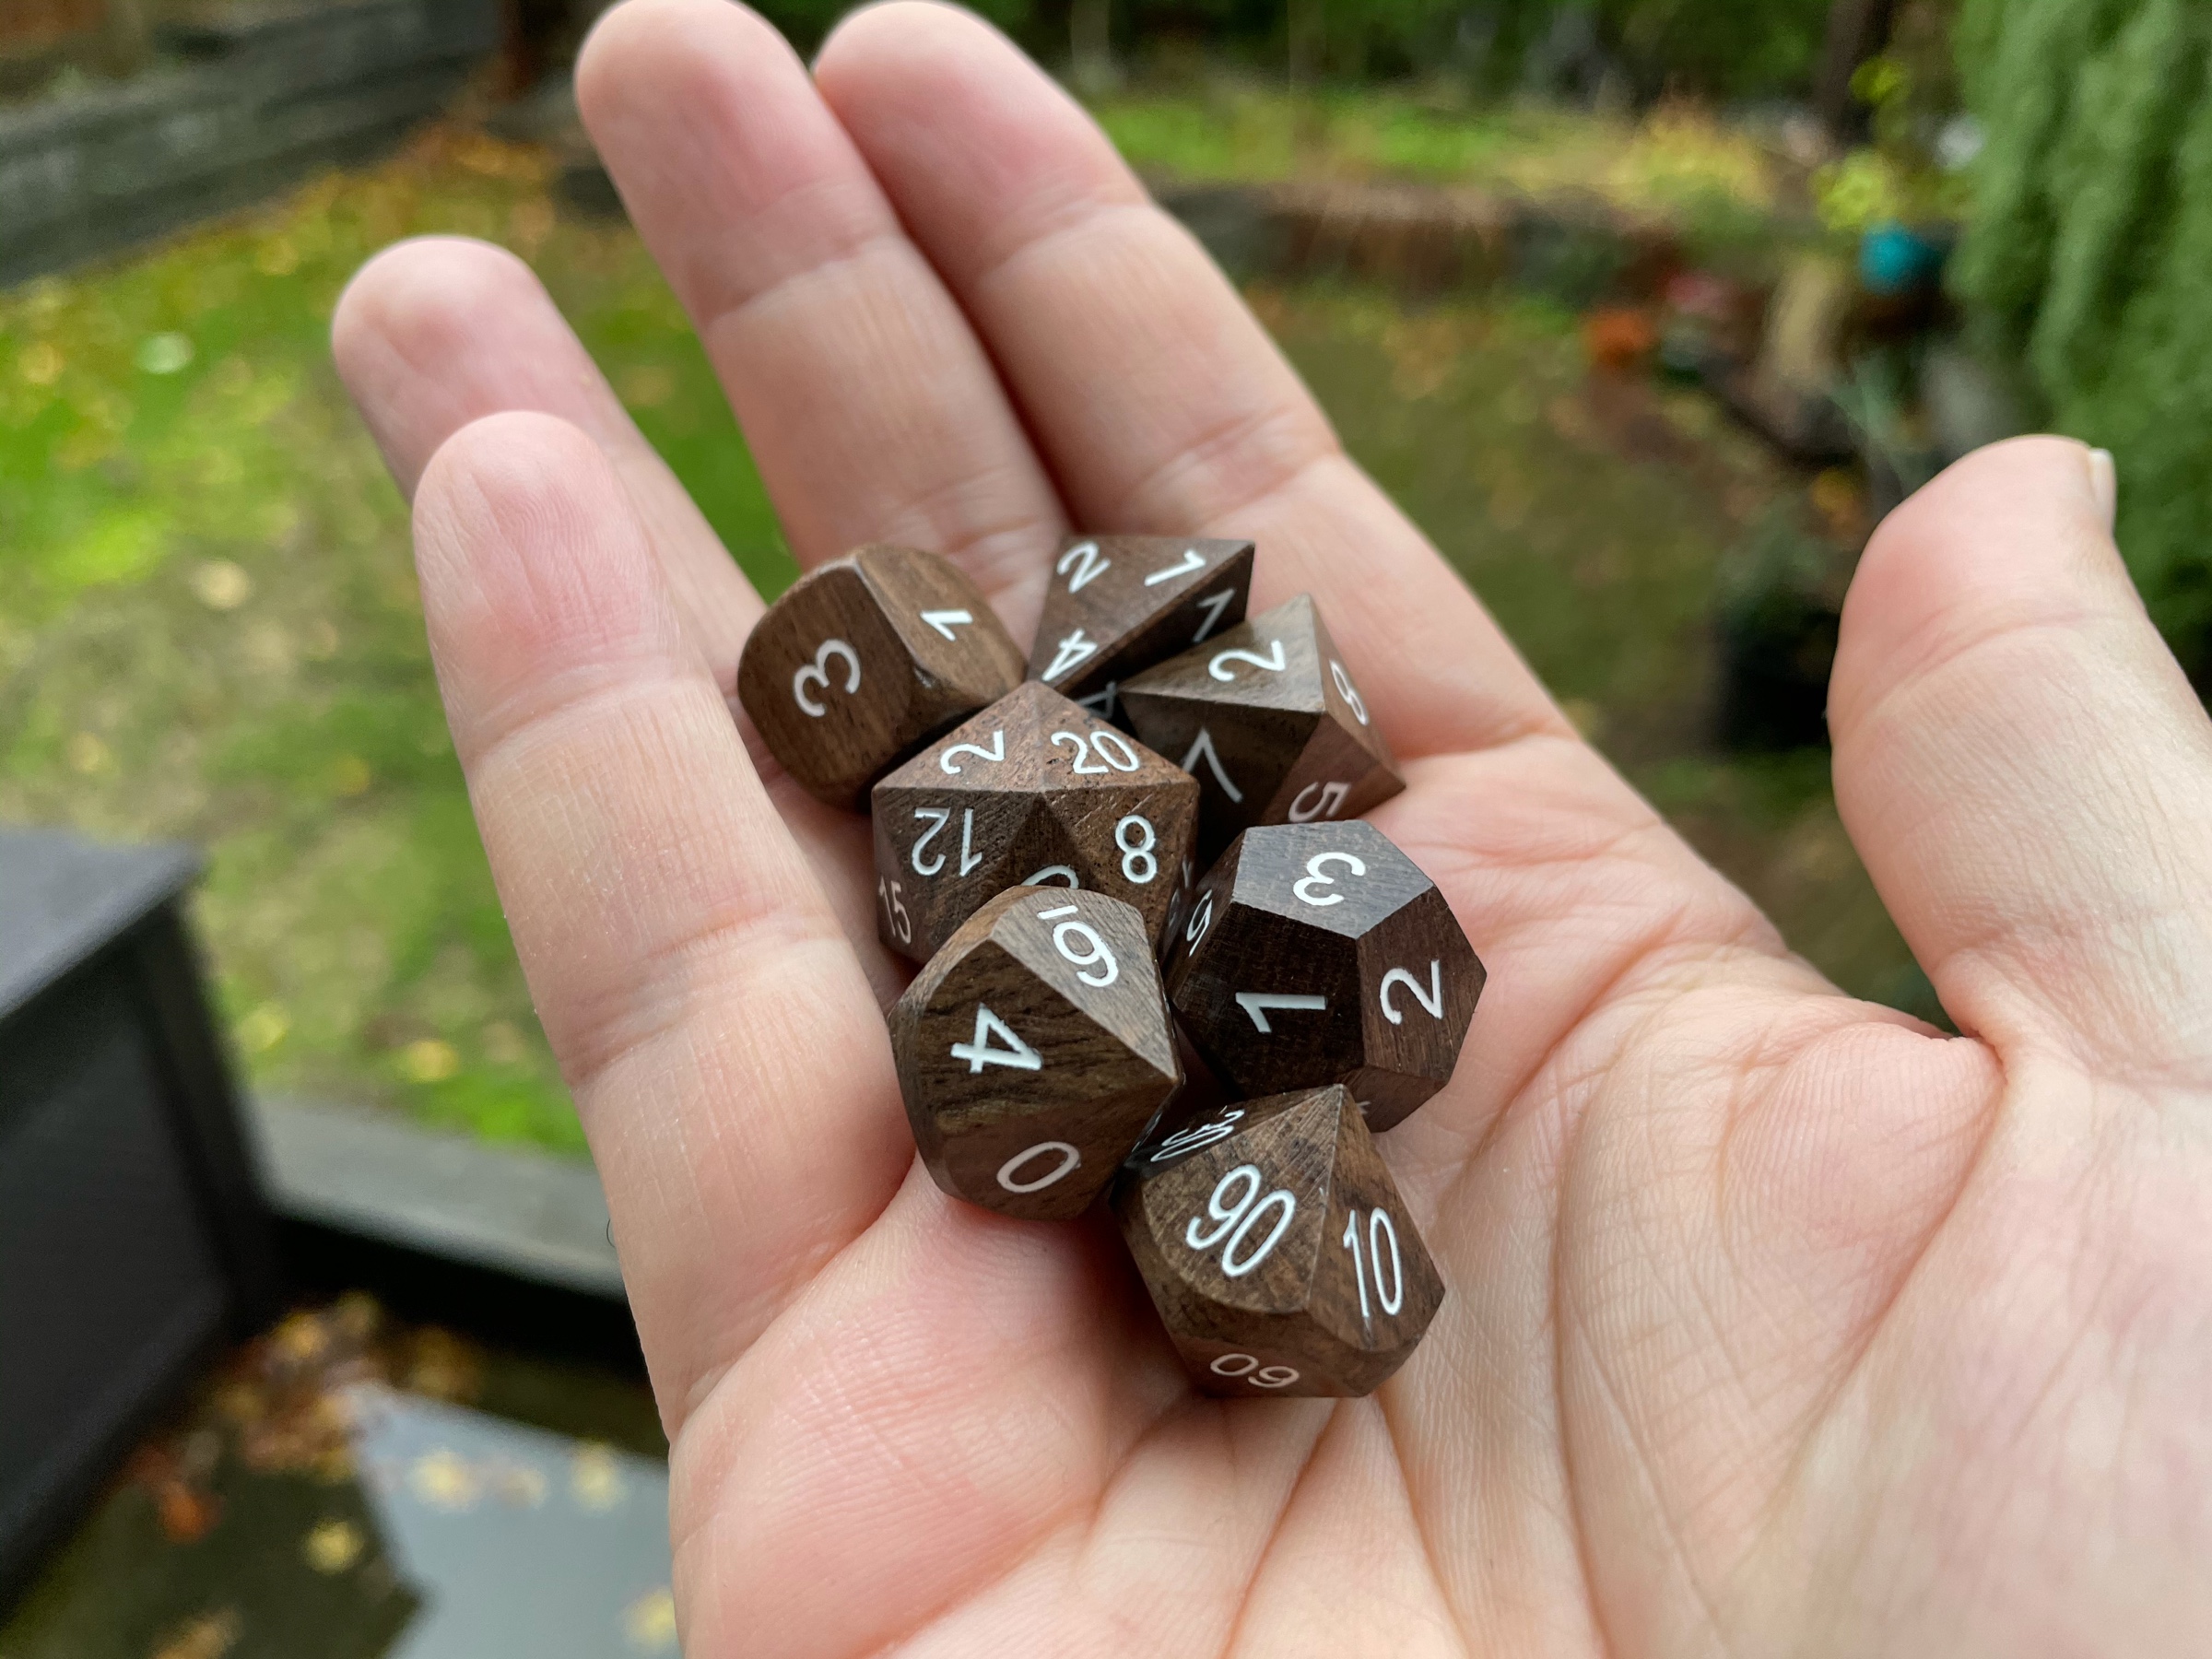
Hey British Columbia, you’re pretty nice in autumn


I usually don’t pay too much attention to GoFundMe campaigns, but when the people in need are the original designers and illustrators of RuneQuest, I figure I can pitch in a bit: https://www.gofundme.com
Hey Lower Mainland people, let’s get our shit back together https://www.cbc.ca
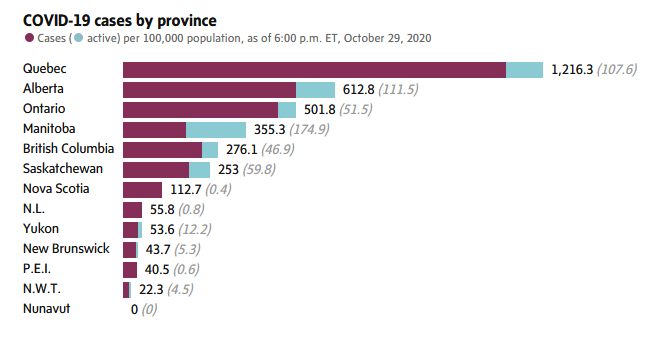
The Covid-19 stats of bi-lingual countries where one of the cultures is French remind us that, well, French people are fucking stupid
This is a nice look at how Fight Club (both the book and the movie, which I loved) was written, including anecdotes I wasn’t aware of! https://youtu.be
Just watched The Goonies with the kids… let’s just say that this movie still has it!
Two eagles doing circles over the nearby lake… I guess we might have a little eagle family there 🦅
1Password Tricks
AgileBits has just released 1Password for Linux in beta, which is super nice! Up until now I had to use the web version, or the 1Password extension in Firefox, when I was on my Linux laptop. To celebrate this, I’m going to share my favourite 1Password trick, which AgileBits incidentally kinda-blogged about not too long ago.
One of the weakest spots in your personal security are the so-called “security questions” that websites force you to enter, and from which somebody can social-engineer their way through your account. Password managers let you store, well, passwords, but you can really store anything you want in there, so why not store stupid answers to those questions? Instead of writing a “real” answer, you can just generate a password, put it in the answer field, and store it in your password manager for later! Simple but effective.
I generally use the word generator in 1Password, instead of the random character string, because there’s a chance you have to speak that answer aloud to some phone operator in the future… “My mother’s maiden name? Why, yes, it’s ‘correct horse battery staple’, sir, thank you”.
I hope it helps!