The central piece to a data-first methodology is, in my opinion, having a file server.
The reason for this is that you’re going to want to access your data anytime, anywhere: streaming your music to your work PC, your movies to your iPad, or accessing your documents from your phone. You need a secure and reliable to way to store and serve that data, and this is best done with a file server.
(if you’re already about to ask why I don’t just use iCloud or something, you may need to read my introduction post again)
Let’s look at the basics for getting a file server after the break.
The hardware
Requirements
The absolute minimum requirements are a computer that’s connected to your home network, and that is always on. Most desktop computers would fit the job description, unless you’re one of those weird people that actually turn their computers off instead of letting them go to sleep. Ideally, however, that file server should have a few other requirements:
-
Low power: it’s going to be always on, so it might as well consume as little energy as possible, not just for the cute baby polar bears but for your electricity bill too.
-
Quiet: that’s important unless you intend to store it away in your basement or something.
-
Data redundancy: hard drives fail – it’s not a matter of “if” but a matter of “when”. And when it happens, you don’t want to have to recover your data from a backup. It’s tedious at best, and you may lose the last hour of work even if you’re using things like Time Machine on a Mac. Only with “copy-on-write” snapshot systems would you not lose anything, except maybe the file that was being saved when the disk failed. Shadow Copy, a little know feature of Windows available for almost 10 years does exactly that, but nobody really uses it as far as I can tell because Microsoft never did any fancy UIs and marketing like Apple did with Time Machine. And this would mean running Windows on your file server, which would probably defeat the previous 2 bullet points as it would require desktop-grade hardware instead of a smaller dedicated box.
Anyway, I highly recommend you get a file server that handles some kind of data redundancy. RAID-1 mirroring is the minimum (2 disks), variants of RAID-5 with 4 disks are the most common, and anything above that is a nice bonus. With both RAID-1 and RAID-5 you get one “free” disk failure – i.e. you can have one disk dying on you, and if no other disk dies while you replace it and the system rebuilds itself, then you’re all good. Of course, even if it’s quite rare, it does happen that a second disk dies soon after (especially if all your disks are the same model, bought at the same time), so make sure you always have a backup ready (we’ll talk about that later in this article).
-
Connected with wires: ideally, the file server should be connected via Gigabit Ethernet. You can always hook it up to a Wi-Fi router down the line, but at least you know the bandwidth bottleneck is not at the source. Sure, the latest forms of Wi-Fi can stream HD videos, but how do you think that’s going to scale when you end up having 2 people streaming from 2 different devices while you’re transfering files and there’s a backup job going on? Yeah. If you can, use wires.
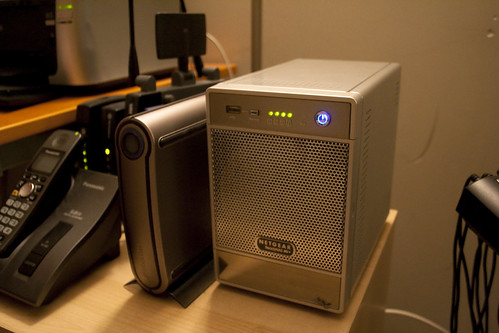
Buying a NAS box
Given these requirements, the easiest way is really to go for a dedicated NAS. Unless you want to go through the trouble of refurbishing an old computer of yours, figuring out how to get the RAID controller to work correctly, and finding a place for a box that’s probably 5 times bigger than it needs to be, that is. You could also build a custom PC, but if you’re considering it, then you’re probably able to figure it out on your own (although I may post a guide in a distant future).
A few years ago, ReadyNAS was all the rage for NASes, with Synology not far behind, but since they’ve been bought by Netgear (which was around the time I bought my NV+), ReadyNAS seems to have fallen behind. Now, the top of the line seems to be Qnap, Thecus, and Synology, if I believe those performance benchmarks.
Have a look at those benchmarks and pick the best models that fit your budget, but do keep an eye out for which configuration is used on each test. For instance, RAID-0 with many bays can out-perform everything else on some tasks, even though in practice it’s probably not a configuration you’d use.
Synology are known to have the more user-friendly administration UIs, so you may want to bias your choice accordingly. You may also be distracted for a while by all the stuff these boxes can do on top of simple file sharing, like BitTorrent clients and web servers and photo galleries and what not. Stay focused on their main role: serving files.
The Software
There’s not much to say about the software. If you bought a pre-built NAS as recommended, it will usually come with its own custom Linux-based OS with a fancy administration UI. You will just boot it, set up the shared folders and permissions, and maybe configure some additional sharing services you may need.
If however you built your own NAS, or are using an existing desktop computer, install whatever you know best – MacOS, Windows, or, ideally, a lean Linux distro. Whatever you end up with, make sure your server is easy to remote into. You’re unlikely to hook up a screen and keyboard to it, so you’ll have to use Remote Desktop (on Windows) or SSH (on Mac/Linux) to do any kind of maintenance work. Note that some Linux distros, like the appropriately named FreeNAS, have a web adminstration panel.
Backups
Once you have your file server running, the first thing you need to do is set up some automated backups.
Let me write this again: YOU NEED TO SET UP SOME AUTOMATED BACKUPS.
I’m not kidding. Don’t say “oh I’m bored, I’ll do it next week-end, I just want to watch Netflix already”. You know perfectly well next week-end you’ll be browsing Facebook and cleaning your house because you had been putting that off for 3 weeks already. So do it now.
Again, if you got a pre-built NAS, this is probably as easy as plugging an external drive to the box and going through the administration panel to find the backup settings. Just do an incremental backup of the whole thing every night to that drive. Bonus points if your backup drive is itself a RAID array.
Your NAS may also have some kind of continuous backup system (sometimes called “snapshots”), so you can enable that too.
If you have a custom box, you’re probably smart enough to setup a scheduled robocopy task (on Windows) or a cronjob running rsync (on Linux/Mac) to backup all your data to a secondary drive. If not, look it up online.
What next?
In the next parts, we’ll discuss a couple things, like what should actually go on that new fancy file server of yours.