When Windows “just works”: part 2 (the work around)
Back in the first part of this 2-part post we looked in some detail at how MacOS mounts network shares, and how badly designed this feature is compared to its Windows counterpart.

We’ll now look at the solution I’m using to fix the problem, which is to mount network shares in a consistent way for a multi-user machine.
The work around
Thanks to the power of UNIX, you can get around the problem by spending hours reading boring documentation, searching useless forums, editing obscure configuration files and generally speaking wasting your time for something Windows gets right in 2 clicks.
If you do the research, you will find lots and lots of solutions – some clever and some completely stupid. Not all of them worked for me, so here’s the solution I came up with. It uses the autofs feature supported by most recent versions of MacOS, and has some pros and cons. “Your mileage may
vary”, as they say.
Creating custom mount points
Start by editing /etc/auto_master. It should look like the following, but without that last line. Add it using your favorite text editor (which you may have to run as root):
#
# Automounter master map
#
+auto_master		# Use directory service
/net			-hosts		-nobrowse,hidefromfinder,nosuid
/home			auto_home	-nobrowse,hidefromfinder
/Network/Servers	-fstab
/-			    -static
/-              auto_smb
Now create /etc/auto_smb and write something like this:
/Users/user1/Volumes/MyStuff -fstype=smbfs ://username:password@server/MyStuff
/Users/user1/Volumes/media   -fstype=smbfs ://username:password@server/media

/Users/user2/Volumes/SomeOtherStuff -fstype=smbfs ://username:password@server/SomeOtherStuff
/Users/user2/Volumes/media          -fstype=smbfs ://username:password@server/media
This file tells the automounter to treat the folders specified at the beginning of each line as mount points for the network shares specified at the end of each line. The file protocol I’m using is smbfs, which is the Windows file-protocol. You could try to use afp here, which is the Apple File Protocol, but I ran into permission problems on files I was editing or creating on my server. Also, depending on your server, smbfs may be faster.
I’m mounting my network shares in each user’s home directory, in a ~/Volumes folder, but you can mount them anywhere else – the whole point here is to have one “mount sandbox” per user instead of the system-wide /Volumes.
Also, here I’m specifying network shares with a custom username and password. You may not need that if you’re using the same credentials on both the local machine and the server. Of course, replace server with your actual server name or IP.
Once that’s done, run sudo automount -vc to tell the automounter to refresh. If it doesn’t work, you may have to create the ~/Volumes directory, along with the mount points themselves. I also ran into problems where the automounter would still be a bit confused and had to reboot to make things work, so you can try that as a last resort.
Accessing the network shares
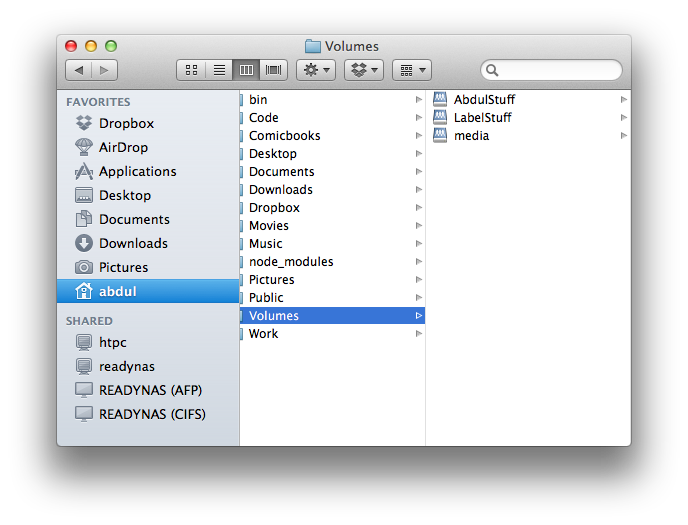
That’s the totally lame part: the mount points you created are not displayed in Finder until they are actually mounted. They will show up only after they’re mounted, which only happens when needed, i.e the first time they are accessed. So, at first, your ~/Volumes directory will be empty – at least in the Finder (if you go there using a Terminal, you will see the mount points, and you can cd into them, which would trigger the mount and make them appear in Finder! Yeah, it’s confusing, I know, welcome to the Apple ecosystem).
How do you access your network shares if you can’t see them in the Finder, then? Well you go directly to them with “Go > Go to Folder…” and enter, say, ~/Volumes/media:
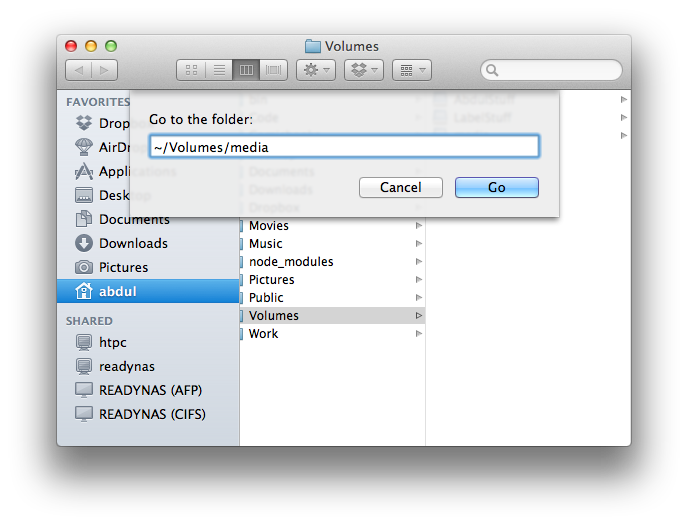
You would only have to do this once in a while because once they are mounted, you’re unlikely to unmount them (you would actually need to use the command line for that). Also, once you gave that path to an application like iTunes or Lightroom, those applications can trigger the mount themselves by merely accessing the path: the next time you reboot and launch the application, it will all magically work (although you may notice a pause for a second or two as the system mounts the network share).
Alternatives
If you want the network shares to be visible in Finder as soon as you login, you can either:
- Make a login item (a Bash or Apple script, for example) that will trigger the mount by accessing the path somehow.
- Specify mount points in
/etc/fstabinstead of through the automounter.
I myself prefer staying with the automounter, because it means I won’t get a timeout when I log into my laptop but I’m not at home. Since I rarely reboot, it’s very uncommon for me to have to manually re-mount my network shares.
Conclusion
This is what makes it possible for me to use my home server along with sharing my Macbook with other users. It was a lot more complicated than I anticipated, but I guess making Macbooks play nice with custom servers would go against Apple’s new cash cow, a.k.a “iCloud”.