When Windows “just works”: part 1 (the problem)
If you asked me a year ago what was the most awesome feature that Windows has and that MacOS doesn’t, I would have probably scratched my head for a bit, mentally sorting through all the obscure advanced things you can do with the Windows SDK and a few lines of code, or all the little things that make organizing files so much easier than with the horrible Mac Finder.
But if you ask me now, I’ll reply straight away this: mapped network drives.

You would think there’s not much to it, but this has been my biggest problem as a user when I switched to a Macbook Pro as my main machine. In the first part of this 2-part post, we’ll look at the problem. Go to part 2 for the solution I’m using.
WTF is a mapped network drive?
In case you don’t know, here’s a little crash course in mapped drives. You can skip ahead if you’ve already used them.
Windows famously uses drive letters for each physical or logical drive hooked up to your computer. This means in most cases you would access your main system drive as C:, some secondary drive as D:, a USB thumbdrive as E:, etc. However, you can also be part of a network, and this means you would access a server’s shared directory as \MyServersharename.
To make things simpler, you can map a server’s shared directory to a new drive letter like Z:. This is not an advanced feature. In fact, it’s always right there in the explorer’s toolbar when you open “My Computer”.
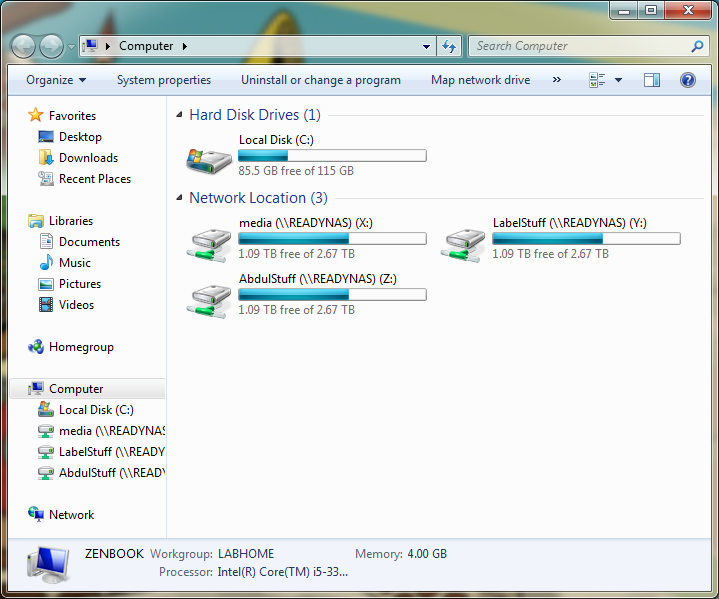
By the way, you can see here my typical setup at home, where I mount 3 shares from my file server: one for my personal data, one for the family data like pictures and home videos, and one for miscellaneous media like movies or music.
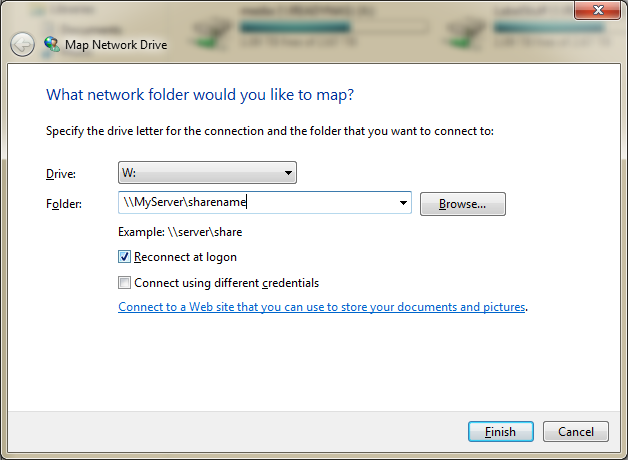
Setting up a mapped network drive takes about 2 clicks and a few keystrokes:
- Click on “Map Network Drive”.
- Type your server’s name and share name.
- Optionally enter specific credentials if the share is protected.
- Done!
At this point, you have a simple and convenient access to your server in a way that’s totally transparent to any application you may run. You can for example run a media manager like iTunes or MediaMonkey and tell it to look for music in Z:Music. It will always work – at least as long as you checked the “Reconnect at logon” option, and you’re of course connected to your network.
Doesn’t MacOS have something similar?
It does. Kinda.
When you’re connected to your network, you will see the available servers in the “Shared” sidebar of the Mac Finder:
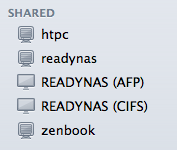
My server here shows up multiple times because it exposes several file protocols that MacOS understands (comparatively, out of the box, Windows only understands its own file protocol and not the Unix or Apple ones).
Once you click on a server, you can browse its shared directories that are available to you, and when you dive into one, it will “mount” it on our file-system. You can tell it’s mounted because the Mac Finder will show an “eject” button next to each mounted share, and next to the server itself. Here I mounted 2 shares:
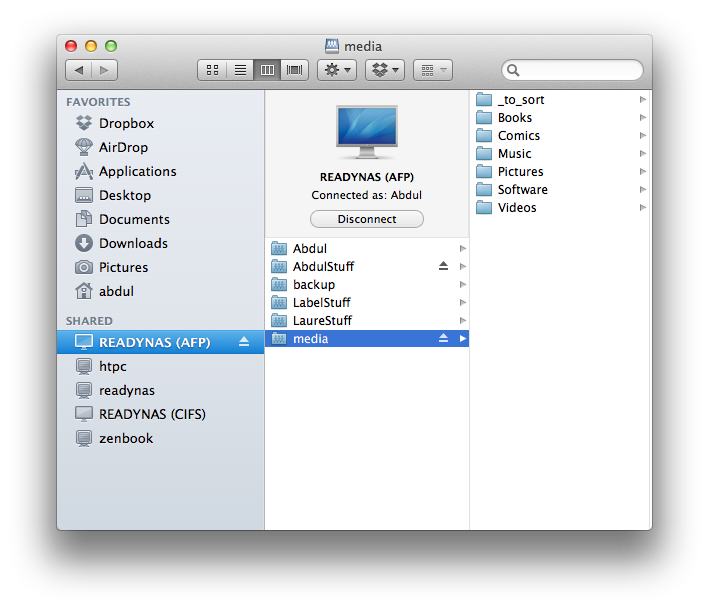
Just like on Windows, the server share is mounted in a way that should be transparent to applications. So it should all work out fine, right?
Well, no.
Under the hood
MacOS is based on a UNIX-like architecture, so there are no drive letters involved here – only mount points that look like directories on the local file-system.
Sure enough, if you open a Terminal and go look into /Volumes, you’ll see the mount points for the stuff I mounted in the previous screenshot:
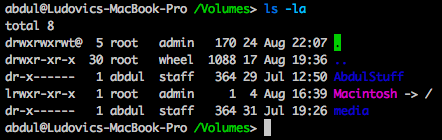
My media folder on my file server is mounted as /Volumes/media, and if I point an application like iTunes to it, that’s the actual path it will use behind the scenes.
The problem of multiples
What happens if another user (say, my wife) logs in and also wants to mount the media folder to listen to some music? Or what happens if you want to mount another share called media from another server?
Well, MacOS, just like any other UNIX-based system out there, does something very stupid: it appends a number at the end of the mount point:
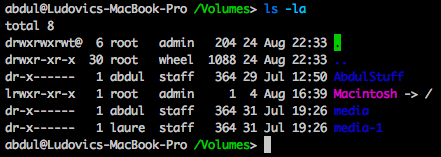
My wife’s media folder is, under the hood, mounted as Volumes/media-1. Other attempts at mounting something with that name will result in Volumes/media-2, Volumes/media-3 and so on.
Of course, this all depends on who mounts things first. If I was the one who logged on to the Macbook later, I would have been assigned media-1 when my wife would have media.
Compare that to Windows’ mapped network drives, which are user-specific, which means there’s no problem as long as you assign the same drive letter to the same network shares – which is a trivial thing to do.
Bad things happen
This is where things break down rapidly.
Did you originally, and unwillingly, tell iTunes your music was in /Volumes/media? Well, now your whole library is empty because it can’t access that directory – it either belongs to one of the other users, or it has been unmounted. Worse, it could actually point to a completely different share that you mounted from another server because it has the same name.
The same thing happens with your Lightroom pictures, your documents or presentations with embedded assets, and any other program that stores paths to some type of data you may have on a file server. All of a sudden, life is not worth living anymore.
The cynical in me tells me Apple doesn’t care about you if you’re sharing your laptop with someone else anyway – they’re not interested in cheap people – but it could actually happen even if you’re the only user: if there was a problem with the server, or with the network connection, well, let’s just say MacOS will be very happy to give up trying to mount your network share at its original mount point, and will instead do it with a new mount point, again with the number suffix. So you could end up with /Volumes/media-1 even if you’re the only user logged in.
Keep reading to part 2 for my work-around.