Ramblings of General Geekery

WPF application patterns continued: convention over configuration

In my previous post on WPF application patterns, I went over a few of the most common patterns available, and gave some pointers on how to implement them in WPF. I mentioned how you could use a dependency injection framework to decouple the implementation of your views and controllers from each other. However, the problem when using dependency injection out of the box is that you need an interface to bind to.

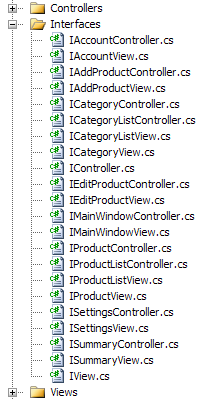
Soon, you end up with this:

And this kind of initialization code (using Ninject1, but it’s straightforward to understand):

class ApplicationModule : StandardModule
{
public override void Load()
{
Bind<IAccountController>().To<AccountController>();
Bind<IAddProductController>().To<AddProductController>();
Bind<ICategoryController>().To<CategoryController>();
Bind<ICategoryListController>().To<CategoryListController>();
Bind<IEditProductController>().To<EditProductController>();
Bind<IMainWindowController>().To<MainWindowController>();
Bind<IProductController>().To<ProductController>();
Bind<IProductListController>().To<ProductListController>();
Bind<ISettingsController>().To<SettingsController>();
Bind<ISummaryController>().To<SummaryController>();
}
}

You’re flooded with interfaces that will be, most of the time, empty (because, remember, you’re using WPF features such as data binding and commanding to control your view, thus removing the need for much specific wiring code beside what will be in the base IView and IController interfaces). Remember that the example above only has 10 views in total, which means it’s a pretty damn small application, and you have to double the initialization code because I just wrote it for the controllers (you need the same thing for the views).

It’s tedious, and quite repetitive, and you know how lazy developers are.

Ruby On Rails made popular the “convention over configuration” paradigm, which previously didn’t have much spotlight. We can get on that bandwagon to remove some of our work.

More specifically, because we’re nice and obedient developers, we know that our controllers and views will be called “FooView” and “BarController“. So instead of getting a view or a controller based on its interface, we could get it based on its “name” (where the name here is “Foo” or “Bar“).

We’re therefore trading this code:

class AccountController : IAccountController
{
public void Execute()
{
IAccountView view = KernelContainer.Kernel.Get<IAccountView>();
}
}

For this code:

class AccountController : IAccountController
{
public void Execute()
{
IAccountView view = (IAccountView)viewFactory.Create("Account");
}
}

By the way, notice how most MVC/MVP frameworks for web applications already work like this.

Anyway, this is not too bad, given that we’re doing this so that we can remove most of our interfaces, and change the initialization code to something much simpler and scalable. In our case, the initialization code could be as follows… First, bind all classes called “SomethingController” or “SomethingView” to themselves:

class ApplicationModule : StandardModule
{
public override void Load()
{
foreach (Assembly assembly in AppDomain.CurrentDomain.GetAssemblies())
{
foreach (Type type in assembly.GetTypes())
{
if (typeof(IView).IsAssignableFrom(type) && type.Name.EndsWith("View"))
Bind(type).ToSelf().Using<TransientBehavior>();
}
}
}
}

Then, implement the IViewFactory by building the full type name of the requested view, and then asking the IOC container to build it for you (as opposed to using Activator.CreateInstance, so that any dependencies are correctly injected):

class ViewFactory : IViewFactory
{
#region IViewFactory Members
public IView Create(string viewName)
{
Type viewType = GetViewType(viewName);
IView view = (IView)KernelContainer.Kernel.Get(viewType);
return view;
}
#endregion
}

This code will stay pretty much the same as the application grows, unlike the other code, and you can switch modules for your unit tests. Of course, you may want to have a more solid test to know what type should be considered a view, or have better control over which assemblies are reflected, etc. This is just example code. Remember also that this is only executed once at startup, so unless you have severe startup performance requirements, the cost shouldn’t be noticeable. Otherwise, you could always generate the code during build and compile that instead.

Now, I know, I know, my original code is not dependency injection, because I’m fetching the IAccountView myself from the IOC container (so this is really a Service Locator pattern). You would preferably have this instead:

class AccountController : IAccountController
{
private IAccountView mView;
public AccountController(IAccountView view)
{
mView = view;
}
public void Execute()
{
// Do something with the view.
}
}

That is, get the view injected into the controller.

However, you can’t do that half the time. The goal of a controller is not only to process user actions on a view, it’s also to choose what view to show in the first place (which means you don’t always have a 1 on 1 relationship between controllers and views). You may therefore have some logic code in there that, depending on the context (is the user logged in, does he belong to the correct group, has he been banned, etc.), will show different views (redirect to the login view, display the regular user or administrator account view, display an error message, etc.). You don’t want all possible views injected in your controller, because any of those views could have a costly constructor itself. So you really need to fetch the view yourself programmatically.

What you would get injected, on the other hand, is the view factory that I use in my modified code:

class AccountController : IAccountController
{
public AccountController(IViewFactory viewFactory)
{
IAccountView view = (IAccountView)viewFactory.Create("Account");
}
}

And as I mentioned earlier, it’s probable that your IAccountView is empty, so you can actually get away with just using IView, thus removing the cast.

Now we have a nice way to manage our views and controllers, and how to make them relate to each other. In future posts, we’ll look at other implementation details of WPF applications, such as giving controllers some context and handling user actions.

1 Because it’s a cool IOC framework, with a super cool name and logo!


Announcing IronCow

One of the projects I’m working on at home, IronCow, is now in a state of "somewhat usable alpha". It’s a .NET API that allows developers to use Remember The Milk, the to-do list website, from any .NET language. IronCow is composed of two layers.

One layer is a "dumb" wrapper around the public REST API, in way very similar to what FlickrNet does with Flickr‘s own REST API. The second layer is a "rich" object model that exposes your tasks (and other data) through classes that stay in sync with the server as you manipulate them. This was done mainly with WPF applications in mind, enabling things like data binding and other reflection-based mechanisms.

IronCow is available on CodePlex.

A sample application that ships with IronCow is IronCow for Powershell. This is a Powershell snap-in that defines a few cmdlets that will let you manage your tasks through the command line! (if you don’t see the point, or think it’s lame, you’re obviously not enough of a geek) You’ll get to type command lines such as:

Get-RtmTask "dueBefore:tomorrow" | Sort Priority,Estimate | Export-Csv $HomeTasksToDoToday.csv

If that’s not cool, I don’t know what is.

This sample application is still a bit rough around the edges (understand: no installer – you need to compile and register the snap-in yourself, and no help file – you need to look at the code to know what parameters the cmdlets take!), but I’ll focus on that once IronCow itself is stabilized. Stay tuned!


WPF application patterns

There's quite a few articles about using the MVC, MVP, MVVM and other MSomethingSomething patterns with WPF applications out there, but I think there's still quite a few things to say on the subject before we can implement all those wonderful acronyms from A to Z without too much worry.

The goal of each of those patterns is to achieve separation of concerns for code reuse, scalability, extensibility, and testability, along with that warm fuzzy feeling you get when you look at your code and you think "wow, this is nice". However, which one should I use for this or that application? What are the pros and cons of each? How do they apply to WPF apps, and how do I implement them?

The View and its Model

Let's start with what we already have: windows and controls. In all those acronymed patterns, this is called the "View".

WPF gives us something with its data binding engine:

<Button Content="{Binding Name}" />

Whatever you bind to the Button needs to have a "Name" property, but there's no requirement on the types or interfaces of either the bound object, or the "Name" property. Of course, in more complex scenarios, things get, well, more complex, but only regarding the type of the properties. In this case, there's a good chance "Name" is assumed to be a System.String, but the object that has a Name can be anything.

This is pretty similar to duck-typing, and gives us a level of abstraction that allows us to switch data bound objects during testing, or even within the application itself, giving to the same UI element objects that behave differently, but look similar. The problem is that there's no way to really enforce the "public aspect" of the data bound object other than by launching the application and looking at the debugging output for some error and warning messages. This is like working with template classes in C++ where you can't know whether you can pass your class to a templated method or class until you've compiled your code and looked at the error messages (or absence thereof). I don't think it's a super nice way of working. IMHO it's better in, say, .NET, where you have constraints on generic classes, which effectively makes you lose the "duck-typing" aspect to C++ templates, but lets you worry less (and gives you all kinds of IDE features to improve your productivity). In our UI application, it's therefore probably better to "enforce" what we expect for our data bound objects by declaring an interface, unless you like looking at the debug output messages.

Here, whatever we bind to the view needs to have a name. The view interface probably has a ViewData property, or SetViewData method, that is of type INamed.

public interface INamed
{
string Name { get; }
}

Those data bound objects are collectively know as the "Model", but this is where some patterns diverge.

If your model is simple enough you won't need to go through an interface. The interface is really needed when unit testing a view can't be done with the actual model, or when the model has dependencies you want to hide. For example, if a model object generates queries to a database, or has other such side effects, you'll have to mock it during your tests. This means that either the object itself is mockable somewhere (disable database queries, or mock the database itself), or you need some wrapper that will expose it indirectly to the view. The wrapper can just be an interface that the model implements, or it can be a proxy object. On the other hand, if the object is "dumb", or has no undesired dependencies, you can use it even during the unit tests.

Mocking the inside of a complex model can lead to difficult to setup tests, where you need to mock the database and the logger and the netwok and whatnot, so it's only useful when you know it won't get out of hand. Some people solve the problem by making the view so empty (in terms of logic code) that there's no point in testing it. The ideal case in WPF is when the view is all XAML markup, with no code behind.

If you're using a proxy or wrapping object around the model, this is known as either the "Presentation Model", or the "View Model". It's a model that you craft specifically for the view, as opposed to the "business" model. In our case, it's frequently an object that implements all kinds of WPF-friendly stuff, like the INotifyPropertyChanged and INotifyCollectionChanged interfaces, or exposes properties that make it easier for WPF designer to write nice templates and styles. For example, you might have the following model:

public enum ModelFlags
{
SomeFlag,
SomeOtherFlag,
YetAnotherFlag
}
public class Model
{
public ModelFlags Flags { get; set; }
}

The ModelProxy class, that you pass to the view, might have the following properties:

public class ModelProxy : INotifyPropertyChanged
{
public bool HasSomeFlag { get; }
public bool HasSomeOtherFlag { get; }
public bool HasYetAnotherFlag { get; }
public ModelProxy(Model model)
{
// wrap the model...
}
}

Those 3 boolean properties will make it easy to dynamically change the look of your UI based on the model's state, because they're easy to hook up to style triggers in XAML markup. If you manage to implement INotifyPropertyChanged for those properties, that's even better, because the UI will change at runtime as the model gets updated.

Controllers and Presenters

Now that we have our views, and the model they manipulate and expose (whether it's the actual model, or some view/presentation model), we need someone to implement the application logic, respond to user input, and take care of the flow that leads the user from view to view. Depending on the pattern you're using, those classes are "Controllers" or "Presenters". Controllers typically handle business logic, whereas presenters handle user input too. I'll only refer to Controllers here to prevent awkward wording.

In WPF there's a few tools that fit quite well with those patterns. The first one is the command mechanism.

<Button Content="{Binding Name}" Command="{x:Static ApplicationCommands.Properties}" />

In this case, our button now triggers the "Properties" command. You can also pass a CommandParameter to the command when the button is invoked. You would typically use the data bound object as the parameter, so use that Binding markup extension there too.

The WPF commands have been quite extensively documented and discussed, so there's no need to explain how they work here. However, there's a few things worth noting.

First, the controller is going to be a class that has a reference to the view it's responsible for, probably through an interface so you can test it with a mocked view. This means the controller is not in WPF's logical or visual trees, so if you're using commands that bubble or tunnel up or down those trees (which is the case for the commonly used RoutedCommand and RoutedUICommand class), the controller can't be notified. There are mainly 2 ways to solve this problem:

  • The view interface exposes a CommandBindings property through which the controller can add its own command handlers. This is really just exposing the already existing CommandBindings property that you can find on almost all WPF controls. This means the view is the one that will really catch the command invocation, but the delegates you're registering will be the controller's. The advantage is that it's super ultra easy to setup. The disadvantage is that only a view's controller can listen to a given command emitted from that view. You could get around this by having a mechanism to get access to other views, but it can become quite messy for highly modular UIs.
  • The other solution is to implement your own kind of commands, as WPF really only knows about the ICommand interface, which was a pretty good move from the guys who designed it. Take a look at the recently released Composite Application Guidance for WPF, where they have commands specifically written for being handled by non UI classes in a modular application.

Second, you might ask the seemingly stupid question: "Who came first? The view or the controller?".

The problem is that the view and the controller both have a reference to each other. The view needs to give the controller some context for it to figure out what to do, and then needs to drive the view into doing what it decided. Using custom written commands in simple scenarios will probably let you avoid keeping a reference in one or the other, but more often than not, you'll need a cyclic reference. This has some impact when using inversion of control or dependency injection frameworks, because this means the view will take the controller as a constructor parameter, or the other way around. This means you "pull" one out of your factory, and the other one gets "pulled" in order to be passed as a dependency.

So far, I haven't found any compelling argument for one or the other. What I do is pass the controller as a constructor parameter to the view because, in my mind, the view comes first. Whether a controller gets attached or not just means you get a functional or completely dead UI. Also, I find that I reuse views with different controllers more often than the other way around, so that's leads to an easier setup of my dependency injection container. You can find arguments for the other way, too. For example, if you consider that the ideal case for a view is to be only plain XAML markup, then the view shouldn't have by default any reference to the controller. This means in turn that the view should be passed as a constructor parameter to the controller.

Some people make the controller also be the view model. They set the view's DataContext to be the instance of the controller responsible for that view. Of course, this is done through an interface. Note that you can play around, here, with 2 interfaces (one for the controller "role" and one for the view model "role") that the controller class both implements. This will be easier to mock for unit tests, and to set up the dependency injection container in the application. Anyway, this can have some advantages, but it prevents reuse of view models, which happens a lot whether it's because you pass the same type to different views, or because you use compositon or inheritance between view model classes.

So what, then?

Well, I hope I gave a good overview of the options that are available when designing a WPF application. It really starts with the UI itself, and commands and data binding, because that's some good stuff you get for free. Design your application around those concepts, and depending on the model you want to manipulate (legacy business model, model you're going to build along with the application, model that comes from a library you don't own, etc.), adapt yourself by either using the PresenterModel or ViewModel patterns as needed. Keep an eye out for testability, and extensibility.

We'll get to more concrete examples in future posts.